User Guide
Table of Contents
3. Un-Install/Remove
Existing OLS
5. Starting off with
AkkenCloud Outlook Sync
6. AkkenCloud Outlook Sync
Options
7. AkkenCloud Outlook Sync
Features
8.1 Supported OLS,
Outlook, Windows, and Minimum System Requirements
8.3 AkkenCloud Outlook
Sync Browser Support
1. Introduction
Outlook sync is an AkkenCloud plugin for Microsoft Outlook which syncs the emails, contacts, tasks into AkkenCloud. AkkenCloud Outlook sync is a VSTO add-in for outlook. So, it only supports a standalone desktop installation Microsoft Office. Outlook Sync does not support Outlook Online, or Outlook Windows App. Outlook Sync is available in both 32- and 64-bit versions. Based on the Outlook bit version, appropriate Outlook Sync add-in must be installed.
Typically to view the Outlook bit version, Open Outlook and Navigate to File >> Office Account >> About Outlook. Once About Outlook is clicked, a screen opens with necessary details. Below is the sample screen.

The Outlook version and the bit is highlighted in the above image. So, for a 64-bit Outlook a 64 version of Outlook Sync must be installed.
Below is the URL to download the latest version of Outlook Sync.
https://openapi.akken.com/AkkenCloudPlugins/OLS
Once the above URL is opened, a landing page for AkkenCloud Outlook Sync opens. Follow the instructions provided on the landing screen for Administrative or Individual User Installation.
2. Installing OLS
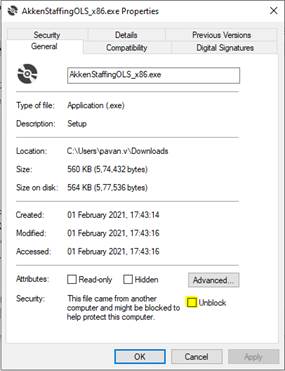
1. Download Outlook Sync installation file from the above URL.
2.
Right click on the downloaded file and click on properties.
Check the check box "Unblock". Then click on apply and ok.
3.
Now right click on the downloaded file and click on run as
administrator. The prerequisite check starts.
4.
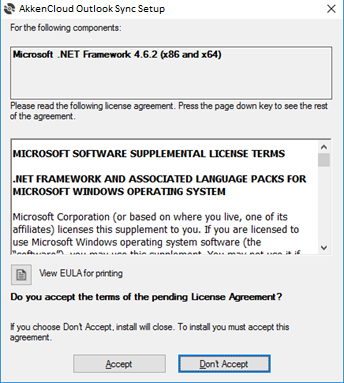
OLS Add-in has .NET Framework v4.6.2 as prerequisite. Before
installing the add-in, OLS checks if computer has all the prerequisites. If all
the prerequisites are installed on the client PC, the installer skips to 6th
step. If not present, prompts to install framework. Click on "Accept" Button.
5.
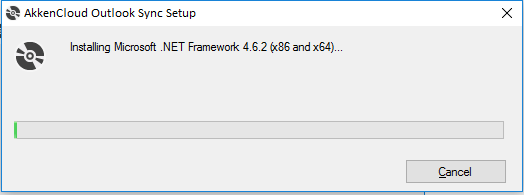
When user clicks on Accept button the framework required is
automatically installed and continues with installation of Add-in.
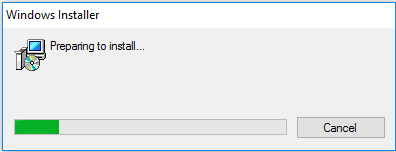
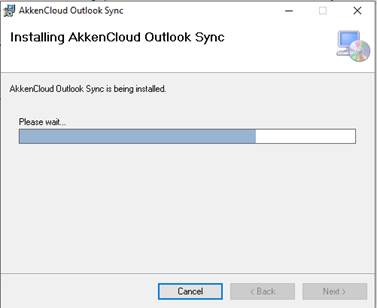
6.
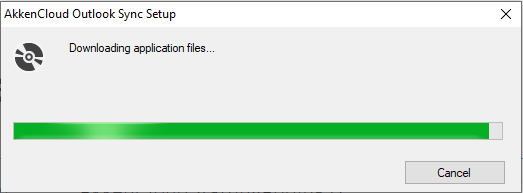
The installation automatically downloads prerequisites from
Official Microsoft website and installs it. Once the installation is completed,
OLS installation starts by downloading the necessary files as shown in the
below image.
7.
Once the download is completed. A prompt for installation of
the same is popped up.
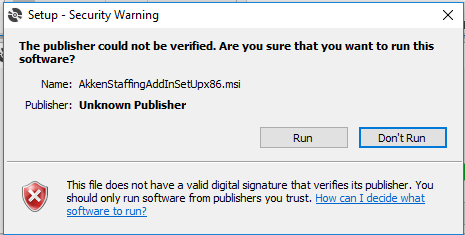
The above prompt is the work of windows
defender smart screen. Microsoft screens every application that is being
installed and takes the reputation of the installer into consideration.
Reputation is the number of user installations of an installer.
Since We have upgraded the installer program
and improved deployment security with embedded auto upgrade functionalities.
OLS is considered a new installer in terms of Microsoft smart screen. Please
click on "Run" and be a trusted installer of Outlook Sync Plug-in.
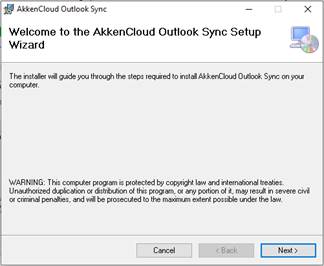
8.
Click on Next.
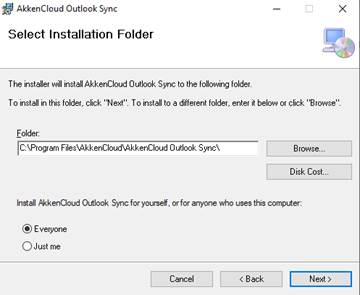
9.
As mentioned in the Web Page of OLS, Click on Everyone for
Administrative Installation of the Add-in or click Just me for user
installation of the Add-in. Click on Next to continue.
10. Once the process in the above
image completes. Restart outlook to
get the latest version of OLS ready to function as shown in the below image.

11. If the user did not find the "Add-ins"
section in the menu bar. User can manually enable the add-in by clicking on
File >> options. An options window is opened.

12. Now click on Add-ins section on
the left pane and click on "Go" button on the bottom as shown in the
above screen. Below is the sample screen.
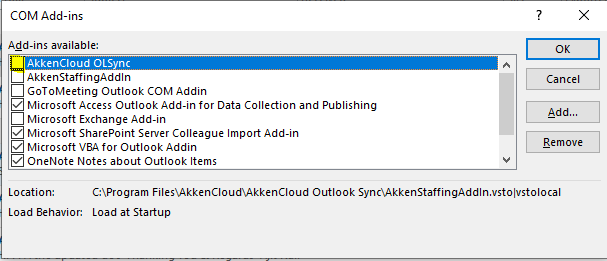
13. Check the checkbox of AkkenCloud OLSync and click on Ok. Now restart the Outlook to use OLS.
3. Un-Install/Remove Existing OLS
To uninstall existing AkkenCloud Outlook Sync
please follow below steps.
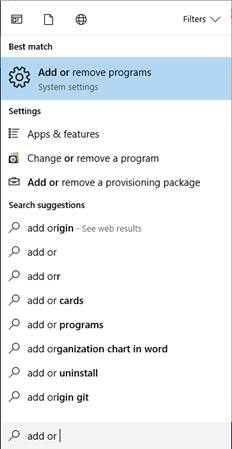
1.
Search for "Add or Remove"
in start search box. As shown in below
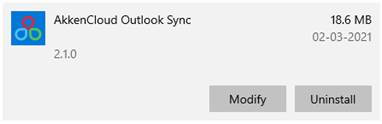
2.
Open Add or Remove Programs. Select "AkkenCloud Outlook Sync" and click on Uninstall Button. As shown in below figure.
3.
Click on next to uninstall the program.
4. Auto Updating OLS
1.
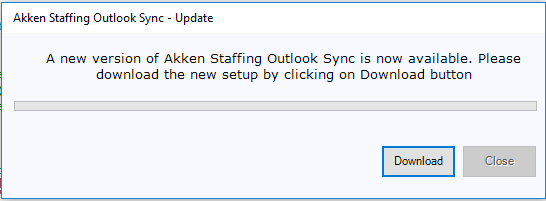
The auto update mechanism is introduced in OLS v2.1.0.0. If
the user installed the OLS v2.1.0.0, further updates are prompted automatically
when a new version is pushed on to AkkenCloud Servers. Below screen prompts
when a new version is available.
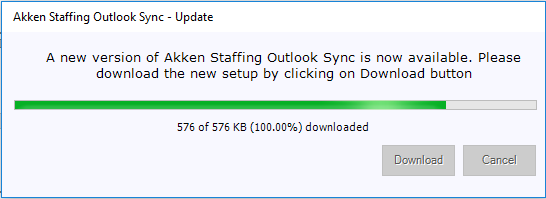
2.
User can click on download and proceed with installation of
OLS. Once the update is pushed to servers and user didn't
update to latest version. OLS is disabled and stops functioning. Since having a
latest version of OLS is a must. Installing/Updating OLS needs Admin
Permissions of computer, close button is provided so that user can continue
working with Outlook until their Administrator installs the latest version.
Below is the screen when user clicks on download button.
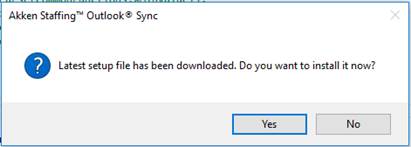
3.
Once downloading of latest version is completed. Below prompt
is displayed and clicking on yes will continue installation of Add-in.
4.
For further process please refer to Installation section from
step-6.
5. Starting off with AkkenCloud Outlook Sync
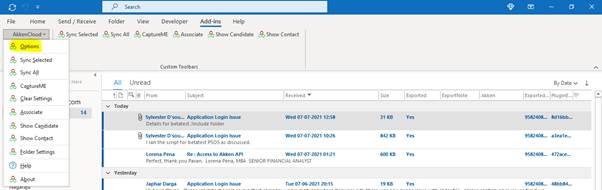
Once the required Outlook sync is installed, Open Outlook. OLS features are visible in the Add-ins section of the Outlook ribbon menu. Below is the sample screen.

Clicking on the Add-ins menu opens the menu with OLS features. To use any of the feature, user will have to be logged into OLS. To open login screen, click on AkkenCloud drop down and click on Options. Below is the sample screen.
Clicking on Options opens settings screen. Below is the sample screen. User will have to login to OLS with AkkenCloud Credentials. Before keying in credentials, User will have to key in URL value. Below is the same.
https://webservices.akken.com/
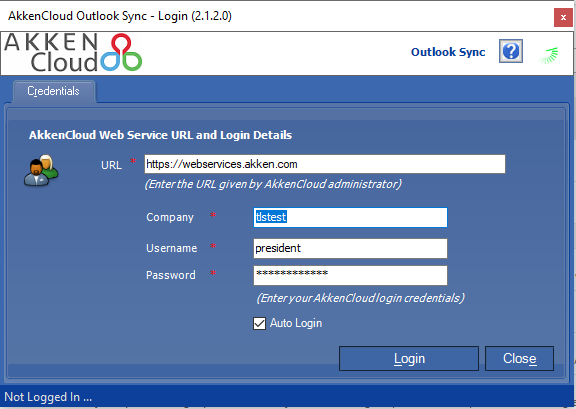
User can check Auto Login, feature so that user need not login every time Outlook is closed and opened.
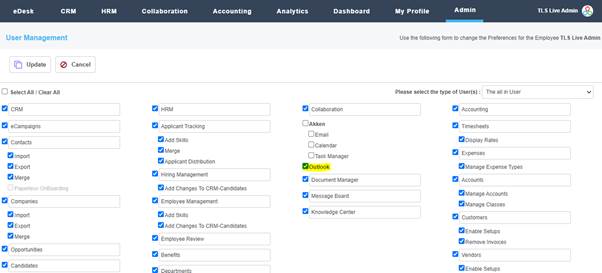
To use OLS, AkkenCloud has two settings which needs to be enabled. They are,
1. AkkenCloud Outlook Sync must be enabled at the backend. (This needs to be done by AkkenCloud Customer Success).
2. Every OLS user must enable Outlook settings under Admin >> User Preferences. As shown in the below image.
If the above settings are not enabled, OLS login fails with below similar access restrictive message.
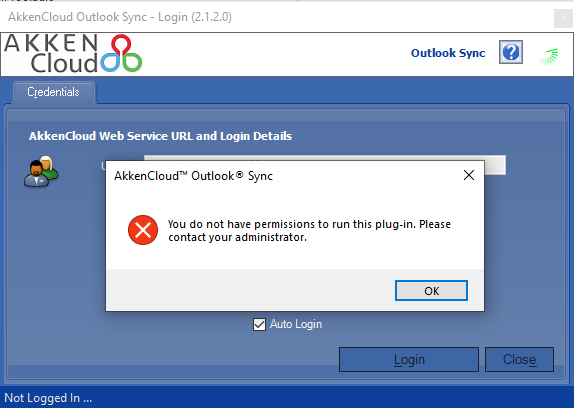
If the above settings are enabled and the provided credentials match, OLS logs in. Now click on Close and open options again to view OLS settings.
6. AkkenCloud Outlook Sync Options
These options help OLS to perform its features as required by the user. A set of five sections are available to choose for the user. Below is an explanation of each section of Options.
6.1 E-mail
Using this section user can opt whether to sync emails from Outlook to AkkenCloud or not. User can click on "No" option under "Do you wish to Sync E-mail Messages?" setting to stop syncing of emails from Outlook to AkkenCloud using OLS.
However, OLS cannot stop email sync if the user performs a sync select feature. A detailed explanation of this feature will be provided in the below sections.
The date "02-11-2021 13:05:30" is the date when OLS is first installed on a PC. Outlook sync skips all the emails that are sent/received before that date in the sync process. So, only the emails that are received/sent after the installation date of OLS will be synced to AkkenCloud.
Note: There are number of instances
where client raises a support ticket to AkkenCloud that the emails are not
syncing prior to a particular time frame. So, please notify this OLS limit.
Emails are synced from Outlook to the activities of a contact or a candidate record in AkkenCloud. AkkenCloud searches for the email address on the email and associates this email to the activities of the matched email addresses in AkkenCloud CRM.
For example, if a received email is synced to AkkenCloud, OLS matches all the from addresses of the email with respective to the emails of CRM records. If any email is matched in the CRM, then an activity record is added.
In the same way when a sent mail is synced to AkkenCloud all the to addresses are matched against the email address of the AkkenCloud CRM records and add an activity record to all the matched contacts/candidates.
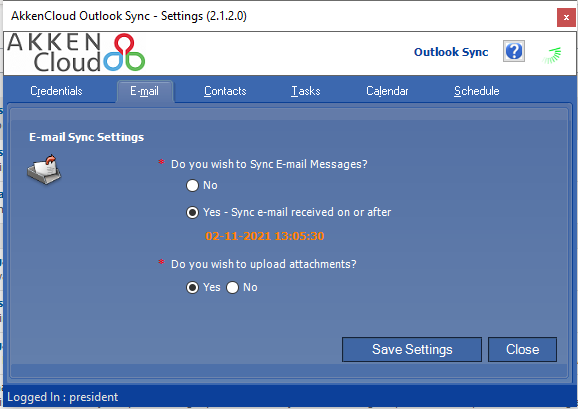
User can also opt if the attachment of an email needs to be synced into AkkenCloud or not by using "Do you wish to upload attachments?" setting in this section. If "No" is opted, OLS does not sync attachments of an email into AkkenCloud, however the email will be synced as expected.
6.2 Contact
Similar to emails, contacts can also be synced from Outlook to AkkenCloud. The synced contacts are visible in the CRM Contacts of AkkenCloud.
Using these options user can opt to sync the contacts into AkkenCloud or block to sync them. Contact sync is by default opted to "No". User can click on the "Yes", if contacts sync needs to be enabled from Outlook to AkkenCloud.
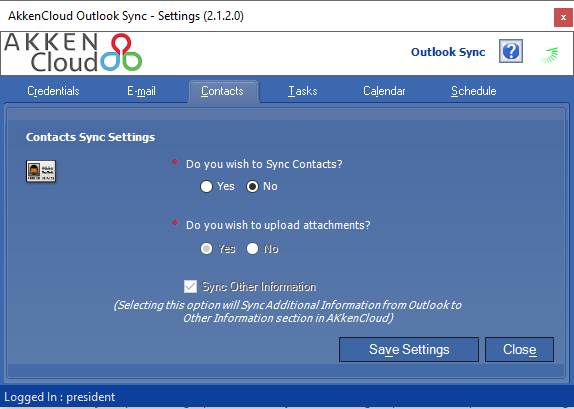
The reasons for disabling contact sync by default are,
1. There is a chance of creating duplicate contacts.
2. There is a change of data over writing from Outlook to AkkenCloud. Since the CRM contact data in AkkenCloud has a greater number of details than that of Outlook, when the same contact is synced, existing data might be overwritten with the details from Outlook.
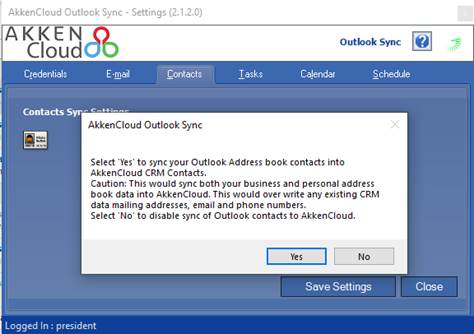
Due to these reasons, when user clicks on "yes" for contacts sync, OLS provides an extra confirmation prompt notifying the problems this might fetch. Below is the sample screen of the same.
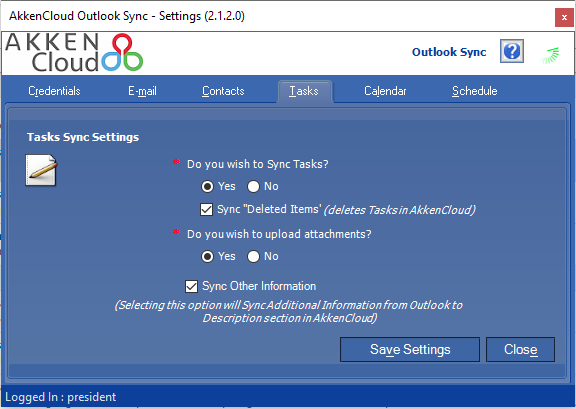
6.3 Task
Task is also one of the Outlook Item, a task can also be synced from Outlook to AkkenCloud. These synced tasks are added into the AkkenCloud Tasks.
Selecting the Sync "Deleted Items" option processes all the tasks in all "Deleted Items" folders and deletes corresponding tasks in Akken.
Select "Sync Other Information" option, if you want to Sync additional information from Outlook to Description section in Tasks screen.
Note: Selecting this option enables you to store the information for the additional fields available in Outlook to be synchronized to "Description" section of the Task Manager. Refer Tasks - Field Mapping section for details on which fields are synchronized by default.
Note: Outlook tasks will not sync if Akken Task Manager is enabled and all options in the Tasks (Tasks Sync Settings) tab will be disabled.
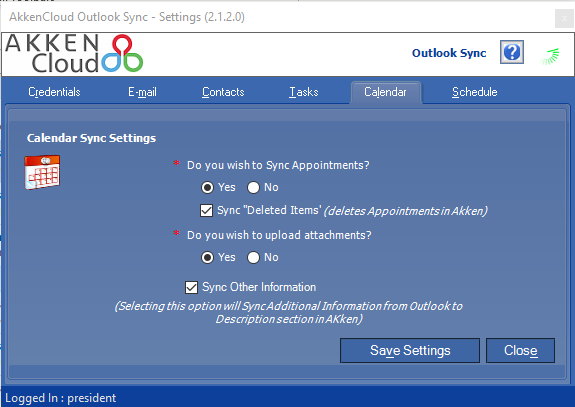
6.4 Calendar
User can opt if the Outlook Appointments to AkkenCloud Appointments. If selected "No", OLS does not sync Appointments into AkkenCloud.
Selecting the "Sync Deleted items" option maintains a sync between Outlook Appointments and AkkenCloud Appointments. If any appointments are deleted in outlook same will be reflected in AkkenCloud too.
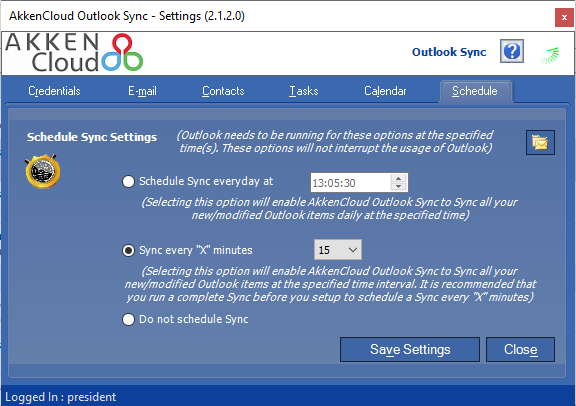
6.5 Schedule Sync
The Schedule tab in the AkkenCloud Outlook Sync - Settings screen allows you to schedule the Sync of your outlook items (Email, Contacts, Tasks, Calendar). OLS facilitates you to Sync your outlook items either on a daily basis or on a specific time-interval basis.
Based on these settings and time intervals OLS initiates an automated background sync process to sync Outlook items into AkkenCloud.
In the below screen:
1. Schedule Sync every day at option provides a feasibility to specify a time to Sync Outlook items. Selecting this option will Sync your Outlook items daily at the time specified.
Note: This form of Sync allows you to Sync all your Outlook items (E-mail, Contacts, Calendars and Tasks) to AkkenCloud. Deleted Items, Outbox and Junk E-mail items are not synchronized in this Sync option.
Tip: It is recommended that you schedule your Sync during off-hours i.e., during night hours.
2. Sync every "X" minute option provides a feasibility to select a time interval in minutes from the dropdown list. OLS initiates a background sync for every time interval of the selected value. The available options for this drop-down are 05, 15, 30, 45, 60 minutes.
Note: This form of Sync will Syncs New e-mail messages contained in all the Personal Folders (based on your Folder Settings) except Deleted Items, Outbox and Junk E-mail and New contacts, Tasks and Appointments.
3. Do not schedule Sync option is to be selected, if user do not want an auto sync in the background. However, user can sync the items using manual options.
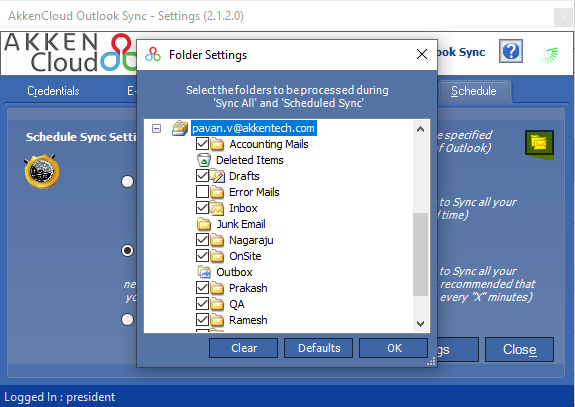
6.6 Folder Settings
Folder Settings can be visible either by clicking on the folder icon in Schedule tab of OLS options screen or clicking on the "Folder Settings" option from the AkkenCloud dropdown.
These folder settings are used in the sync all and auto sync features. Using this folder settings, OLS decides to sync email from a particular folder or not. Folder options are only considered while performing sync all and auto sync. However, sync selected does not consider these settings.
User can opt the folders from which the emails need to be synced. All the unchecked folders will be neglected from the sync process by OLS.
7. AkkenCloud Outlook Sync Features
7.1 Outlook Items Sync
AkkenCloud Outlook Sync can process Emails, Contacts, Tasks and Calendar items from Outlook to AkkenCloud. In this section, the detail of where these items are synced into AkkenCloud is explained.
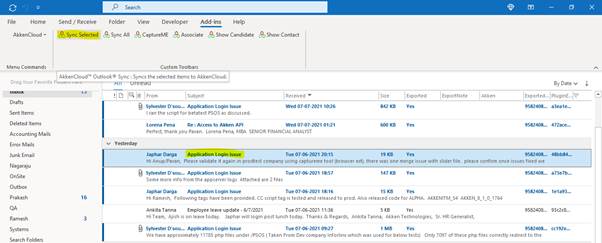
7.1.1 Emails
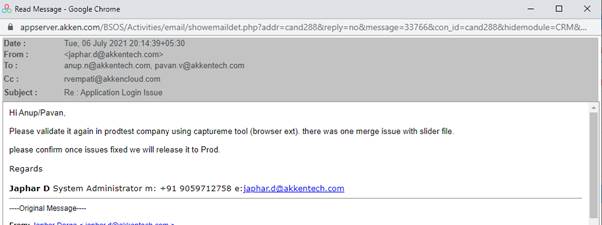
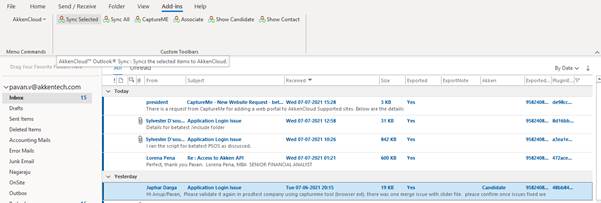
As explained in the above sections, Emails that are synced from Outlook are added into the activities of the respective CRM record in AkkenCloud. In the below Image, the selected email is synced to AkkenCloud using OLS.
This synced email can be viewed in the activities of the CRM record with an email Japhar.d@akkentech.com. Below is the sample screen.
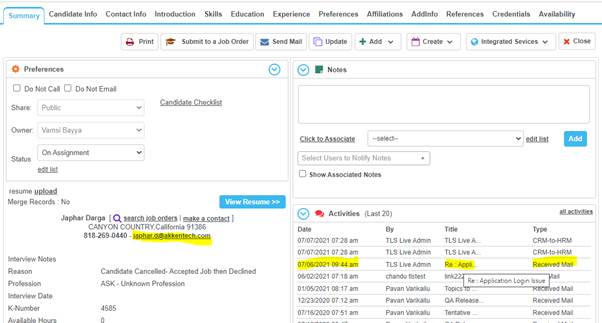
User can also double click on the activity record which opens the complete email for review as shown in the below screen.
7.1.2 Contacts
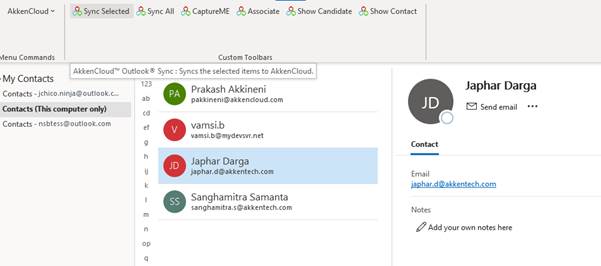
Contacts that are synced from Outlook to AkkenCloud can be viewed in CRM >> Contacts. Syncing one of the contact from Outlook as shown in the below image.
The selected contact can be viewed in the Contacts grid of AkkenCloud once the sync is processed. Below is the same.
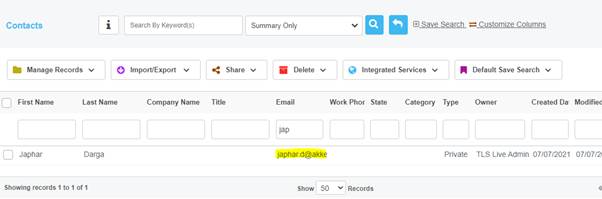
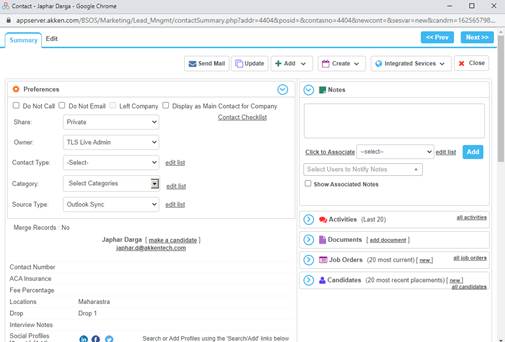
User can double click on the record in the grid to open contact summary screen.
7.1.3 Tasks
Tasks that are synced from Outlook can be viewed in the Task Manager of AkkenCloud. Below is a sample Outlook Task to be synced.
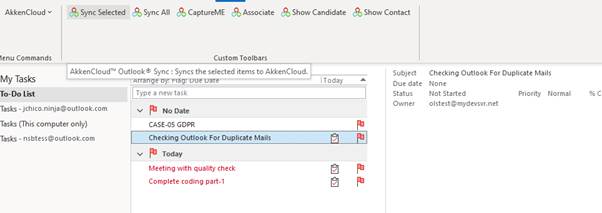
If the selected task in the above image is synced, user can view this task from edesk >> Tasks. Below is the sample image.
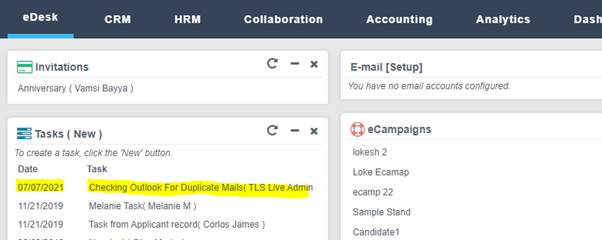
User can double click on the record to open the complete task details.
7.2 Sync Selected
Sync Selected is a feature of OLS is a manual process of syncing items of Outlook to AkkenCloud. User can select any item (email, contact, task, calendar) and click on "Sync Selected" menu item of the add-ins section. OLS then syncs the selected item into AkkenCloud. Below is the sample screen.
Once the user clicks on sync selected, OLS fetches the data of the selected email/contact/task from Outlook and syncs this data into AkkenCloud.
Below confirmation prompt appears once the email is synced successfully.

7.3 Sync All
Sync all is a feature that syncs all new outlook items based on the OLS options. This is also a manual process to sync outlook items to AkkenCloud. Below is the screen after user click on the sync all menu under Add-ins section.


OLS provides an option for the user to sync all now or to schedule a sync all at a given point of time. Using Sync All, user will not be able to work on Outlook. User can select any of the option and click on "Ok". To start the process.
Usually, Schedule Sync at will be opted if user intends to start the sync process after his/her work is completed. Checking on "Resend All" will sync all of the data again to AkkenCloud (This is not at all recommended).
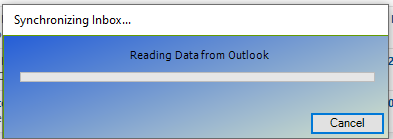
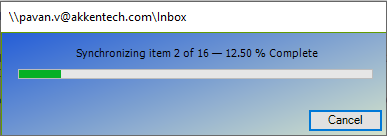
Based on the option user selected, once the user clicks on Ok, OLS finds all the new Outlook items which are not already synced into AkkenCloud and process these items folder by folder item by item. Below screen appears with the progress of the items that are syncing.
7.4 Auto Sync
Auto Sync is nothing, but a Sync All feature but is automatically triggered by OLS program based on the settings from "Schedule" tab (explained in the above sections). Unlike Sync All feature, using this, user can work with Outlook where the syncing process is carried behind the scenes.
But any other functions of OLS can not be accessed while an auto sync is in progress.
7.5 CaptureME
CaptureME in OLS is a feature to create a candidate in AkkenCloud. CaptureME is functional only when user selects an email. Unlike, sync selected, CaptureME does not work with contacts, tasks and calendar items of Outlook.
An email with resume as an attachment must be selected and CaptureME is clicked to process the resume and create a candidate. OLS CaptureME functionality provides two different options to process the resume. Below is the sample screen.
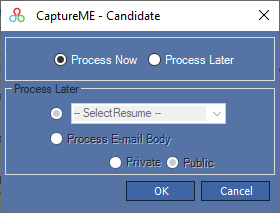
1.
Process Now
Use this option to process the e-mail to create the candidate profile instantly. In Outlook, select an e-mail with resume and click CaptureME option in the toolbar. Select Process Now option and click OK. CaptureME - Candidate screen is displayed, as shown below: In the above screen, click Ok.
Now OLS takes the resume from the email and opens a process resume screen of AkkenCloud. As shown in the below screen.
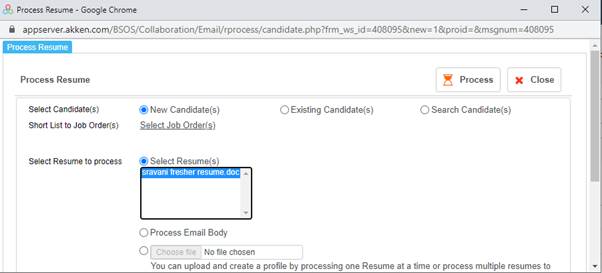
In the above screen, select the resume and click Process.
2.
Process Later
Use this option to save the settings for creating the candidate profile in Akken Staffing application. The candidate profile is created when the email is synchronized later during any one of the 'Sync Selected', 'Sync All', 'XHour/XMin' or 'Scheduled Sync' operations.
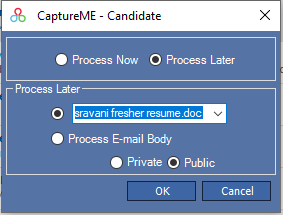
In the Process Later section:
* Select candidate resume if the e-mail has resume as attachment in Select Resume drop-down.
* Select Process E-mail Body option if the resume is contained in the body of the e-mail.
Select Private or Public option to set the Share (Type) status for the candidate record and click OK.
Note:
1. The processed e-mail is tracked in Activities section of Candidate - Summary screen.
2. The Source Type for the captured candidate is displayed as "Outlook" in Candidate - Summary Screen - Candidate Info tab.
3. You can search for candidates by entering "Outlook" as search keyword in "Search By Keyword(s)" field in the Candidates home page.
4. Click Clear Settings option under Akken menu if you wish to clear the CaptureMe setting.
7.6 Associate
Associate is a feature OLS provides to attach a particular email to a CRM record which does not match with the from or to email address of the email. Sync feature of an email adds an activity record based on the CRM record email address match criteria.
If user intended to attach an email to any other CRM record, associate feature must be used. User can select an email and click on associate. Below screens opens with options to select companies, contacts etc.
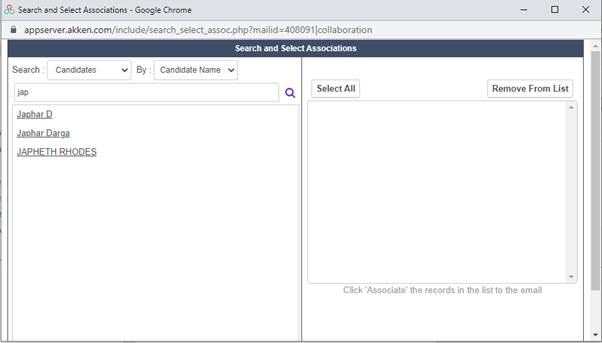
User can search for different data sets and click on the desired record to associate. And click on Associate at the bottom of the screen.
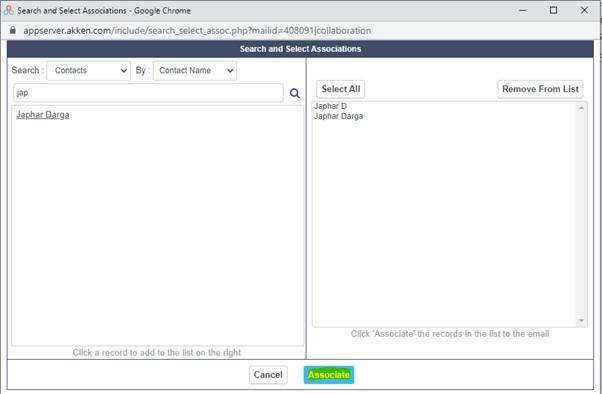
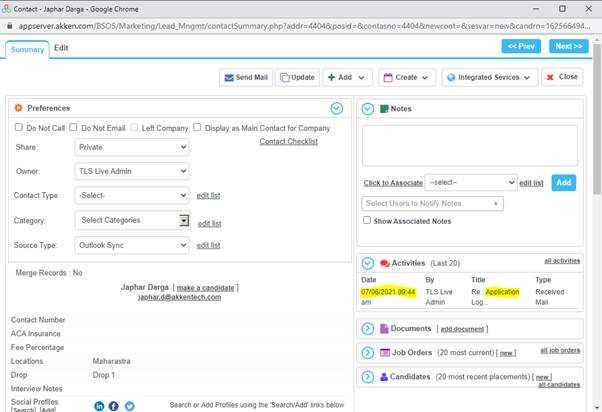
Now the email will be added into activities of both records Japhar D (candidate) and Japhar Darga (Contact). Below are the screens for the same.
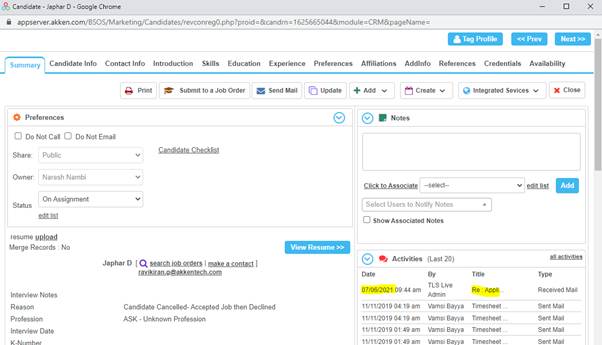
7.7 Show Candidate
Show Candidate is a feature used to open the candidate record associate with the email. As discussed in the above sections, if the email is associated with any CRM Candidate record by matching email address criteria, clicking on Show Candidate Opens this associated CRM Candidate record. Below are the sample screens.
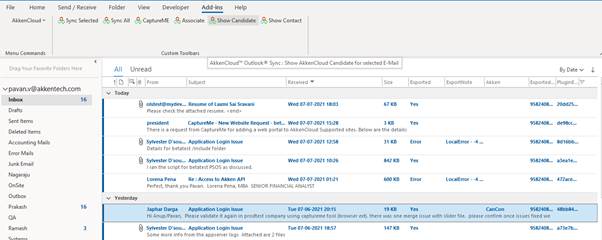
From the above image, if the from email address Japhar.d@akkentech.com is a primary of any of the CRM Candidate record, then that particular candidate record opens. As shown in the below image.
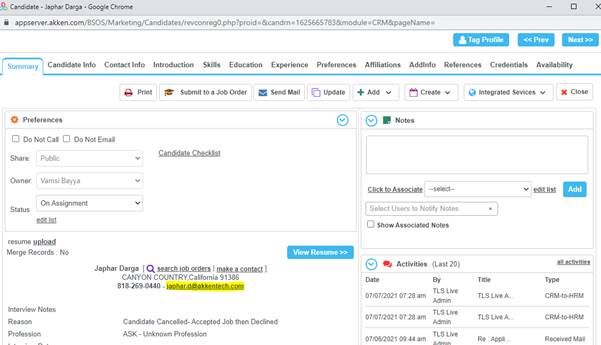
With the help of this feature, user need not search for the associated candidate record in AkkenCloud CRM. Any action on the candidate record can be done without manually switching between applications or the browser tabs. This feature increases workability of a user.
7.8 Show Contact
Show Contact is a feature used to open the contact record associate with the email. As discussed in the above sections, if the email is associated with any CRM Contact record by matching email address criteria, clicking on Show Contact Opens the associated CRM Contact record. Below are the sample screens.
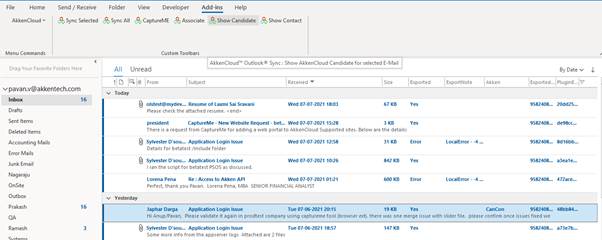
From the above image, if the from email address Japhar.d@akkentech.com is a primary of any of the CRM Contact record, then that particular contact record opens. As shown in the below image.
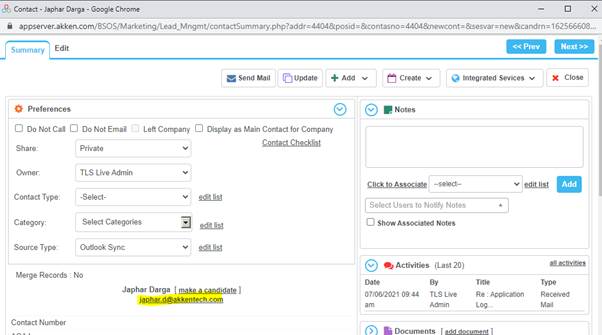
With the help of this feature, user need not search for the associated contact record in AkkenCloud CRM. Any action on the contact record can be done without manually switching between applications or the browser tabs. This feature increases workability of a user.
8.0 Miscellaneous
8.1 Supported OLS, Outlook, Windows, and Minimum System Requirements
|
Latest OLS Version |
OLS v 2.1.2.0 |
|
Supported OLS Version |
Higher than OLS v 2.0.0.0 |
|
Supported OS |
Windows 8.1, Windows 10 |
|
Supported Outlook |
Outlook 2013, 2016 and Office 365 (desktop version) |
|
Minimum System Requirements |
Computer and processor 1.6 GHz or faster, 2-core Memory 4 GB RAM; 2 GB RAM (32-bit) Hard disk 4 GB of available disk space |
8.2 Enabling Custom Columns
Custom properties/columns are the extra fields that can be added into the reading pane of a folder. These extra fields contain the details like whether the email is synced or not, If the email is linked to a candidate or a contact etc., Below is the sample screen when custom columns are enabled.

All the highlighted columns in the above image are custom properties/columns. Each column contains a specific information about that particular email.
*
Exported: This column depicts if the email sync is successful or not.
Typically, this column contains "Yes", "No", "Error", " "(blank) values.
Yes indicates that the email sync process successfully to AkkenCloud.
No indicates that the email sync process is not successful and halted for a reason.
Error indicates that the email sync attempted but resulted in an error.
Empty indicates that the email sync is yet to be attempted.
*
Exported Note: This column contains a detail on the error occurred while syncing
email. Typically, it is an error message. This column is either blank or has an
error message. This column is linked with Exported column. An error message is
displayed only when the exported column status is Error.
*
Akken: This column contains the value of the type of CRM Record this email
is attached to. Typically, the values of this column can be Empty, Cand, Con or
CanCon.
Cand if the email is associated with at candidate record.
Con if the email is associated with a contact record.
CandCon if the email is associated with both candidate record and a contact record.
*
Exported Folder: This field depicts the internal folder id of the folder.
*
PluginEntryId: This
field depicts the unique plugin id for every email.
Note: Exported Folder and Plugin Entry
Id are for the admin usage, user need not add these columns into the reading
pane. These columns help while tracing any issue or in a debug mode only.
Note: At least one email must be
synced into AkkenCloud to be able to add custom columns/properties into the
reading pane. By following below steps, if user did not find "User defined
fields in folder", then sync at least one email and follow the process
again.
Steps
to enable Custom Columns/Properties:
1.
Custom User Properties (columns) will only be visible if the
Reading Pane is "off".
a. Open Outlook and
click on "View" in Control Bar.
b. In the Menu
Section, click on "Reading Pane" and
select "off". As shown in below
figure.

2.
In the same menu, click on "Add Columns". A window pops out with all available columns in
outlook.
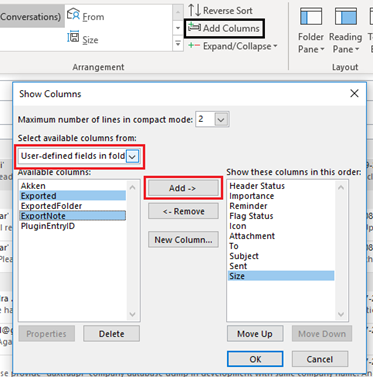
a. Under "Select available columns from:" label,
one can see a dropdown will all possible columns. Click on the Drop Down and
scroll to the bottom to see User - defined fields in folder.
b. All available columns
from AkkenCloud Addin are visible on the left pane. Select "Exported", "Export Note" and "Akken" and click on "Add" button.
c. Finally click on
ok.
3.
Once the columns are added. User can see them on Folder
columns as shown in the below figure.

a.
If an email is marked as "Error", Outlook Sync will not attempt a sync operation on that
email (sync all/auto sync). Unless user performs a "Sync Selected" operation on the email.
8.3 AkkenCloud Outlook Sync Browser Support
In AkkenCloud Outlook Sync, features like captureme, associate, show contact, and show candidate opens AkkenCloud screens. OLS has deprecated its support to Internet Explorer from OLS v2.1.0.0 and extended the support to Edge, Chrome, Firefox and Opera.
From OLS v2.1.0.0 while using above features, OLS opens AkkenCloud in Default Browser of the computer/PC. User will have to login into AkkenCloud application in the default browser before using these features. If the user is not logged into AkkenCloud in the default browser, OLS opens an AkkenCloud login screen. Once the user logs in, the functionality resumes.